
This post will provide you with guidance on how you can set up your server spawn. If you follow our tutorial you will have a functioning server spawn ready for your players to explore and enjoy by the end of this post.
Our tutorial is using WorldEdit, a pre-made spawn schematic from Minecraft Schematics, EssentialsX Spawn, WorldGuard, LuckPerms, and DecentHolograms. We're hosting our server on GTX Gaming, and we're using a Spigot 1.19.2 server and plugins. If you're using an alternative server host you may find the instructions will be slightly different but should be largely the same.
For the purposes of this tutorial, we're using a pre-made spawn schematic, but most servers will build their own spawn, either alone (which can be a large project) or in a build team.
Make sure you are OP and have flying permissions, to make your life easier. To do this, go to your web console (on your server host), and type 'op <username>'. Ingame, change your personal gamemode to Creative by typing '/gamemode creative <username>'. For ease, your character can now easily fly (press double jump) and use OP commands.
Installation
To install our plugins we need to go to our server host game panel and go to File Manager and then /plugins. Simply drag and drop the .jar files into the /plugins folder, and either restart your server or type /reload ingame.
Once your WorldEdit folder generates in your /plugins folder, go inside, and open /schematics, this is where we'll drag and drop our downloaded spawn schematic.
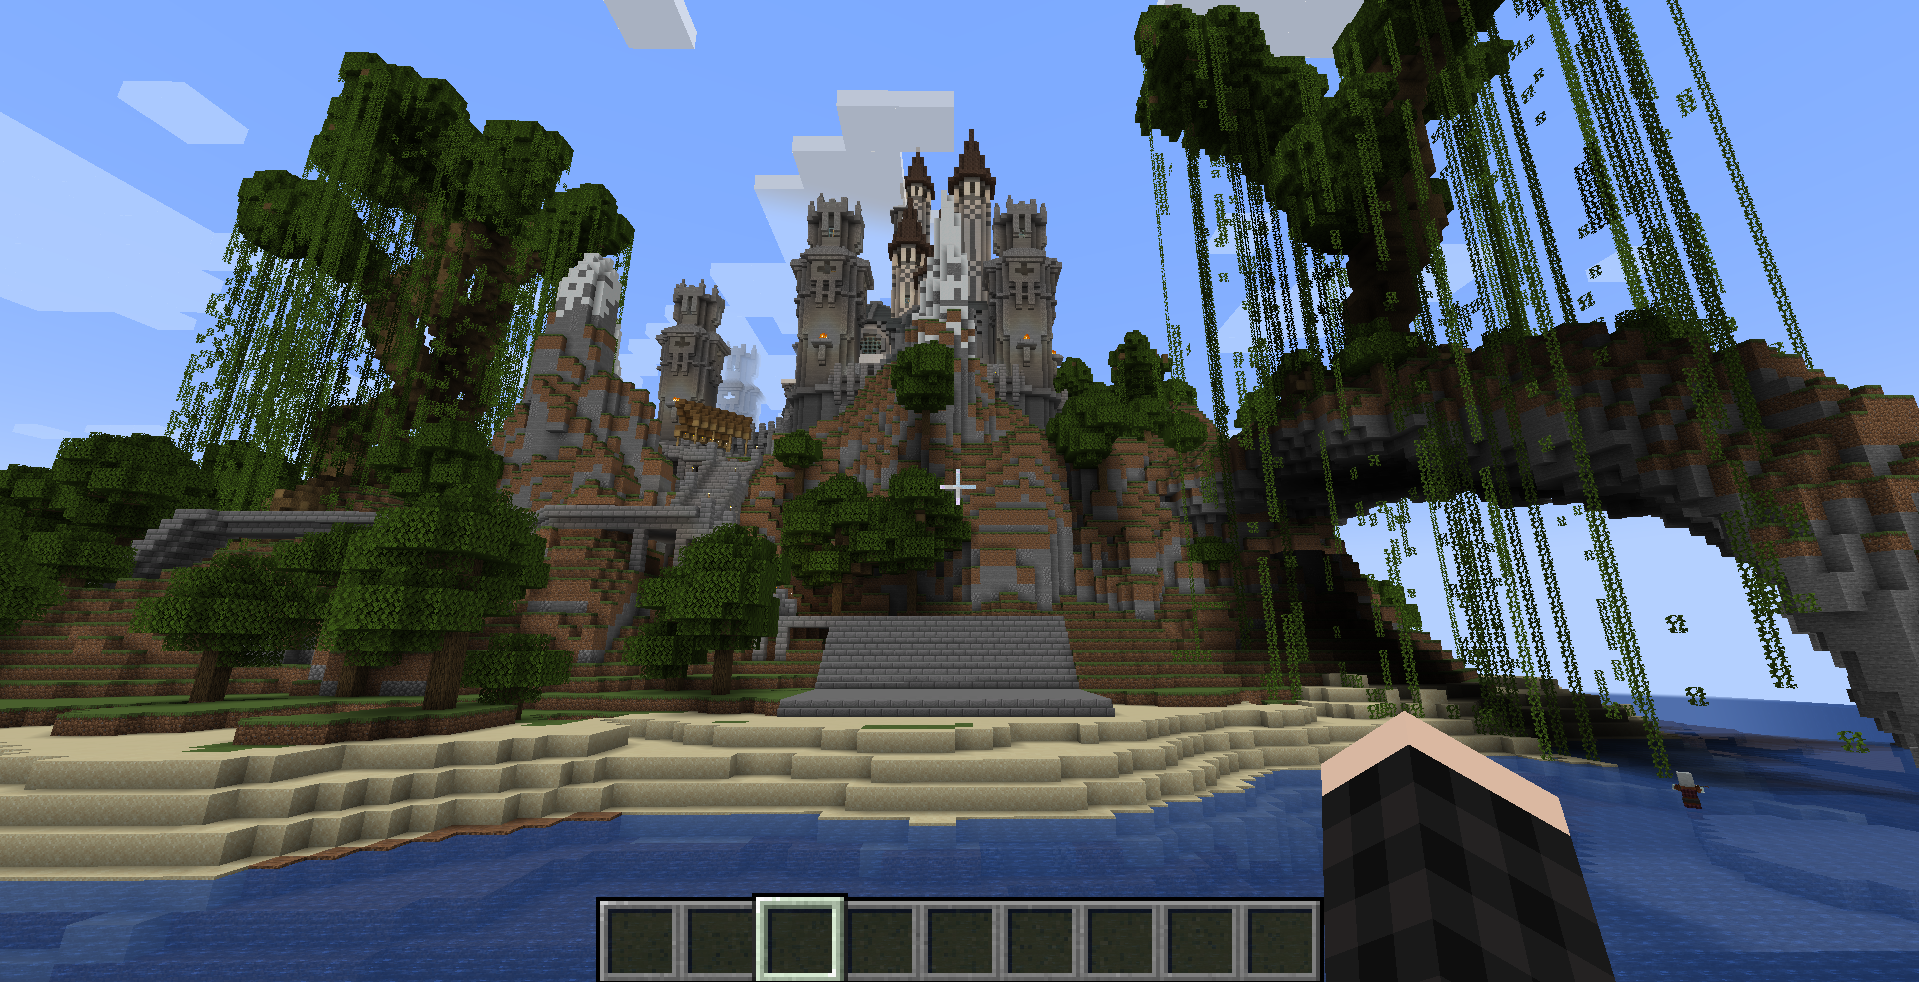
We're using a Medieval Castle spawn made by Kylethenile and uploaded to Minecraft Schematics. We can now place our spawn ingame using WorldEdit. Load the schematic by typing '/schem load <schematic name>', once loaded we'll place this ingame:
Setting The Spawn Point For All Players Who Join our Server
We want all of our new players to have the same starting experience so we want our players to log in at the same location, in safety. To do this, we're using the EssentialsX Spawn plugin, and it couldn't be simpler. We simply need to type '/setspawn' while standing in our chosen location, and all players who are in our default permission group will log into our medieval castle at the bottom of the stone steps.
You may have noticed I said default permission group. This is correct, every player who joins our server for the first time will be in the default permission group. This is where our permission system comes into play, and because we're using LuckPerms, you may find our YouTube video useful, or our tutorial on creating ranks with LuckPerms.
We can set spawn points for groups, or individuals, which can provide you with additional creative options when you are making your world. This will be a great option for you to use if you decide to create a network and launch a new map - if you wanted, when players travel to the new map, they can be assigned different spawn points depending on their rank (permission group). This could be really useful for an RPG story-based server who wants their warrior and gladiators to be sent to a different destination compared to their civilians and nobles.
Because we are only setting our spawn for new players, we just want to use the default group for now.
Customising The New Player Spawn
At this point, this is where we would add info for our server. What does the player need to know when they join your server for the first time? Do they have any commands they can use straight away? Do they need to know any backstory or need to know where they can travel to?
We can add this info in a few ways. We could make several wooden signs but this can be messy and overwhelming when there is a lot of information. We could use billboards, so we could make our 'poster' in a program such as Paint or Photoshop etc, and then import this into Minecraft. There are several plugins for this, and PixelPrinter is just an example so you can get an idea of what you can achieve.
We're going to use some holograms, however. Holograms are extremely common, and we can place them at strategic points to help guild our players. We're going to use DecentHolograms for our customisation, a useful and easy-to-use plugin.
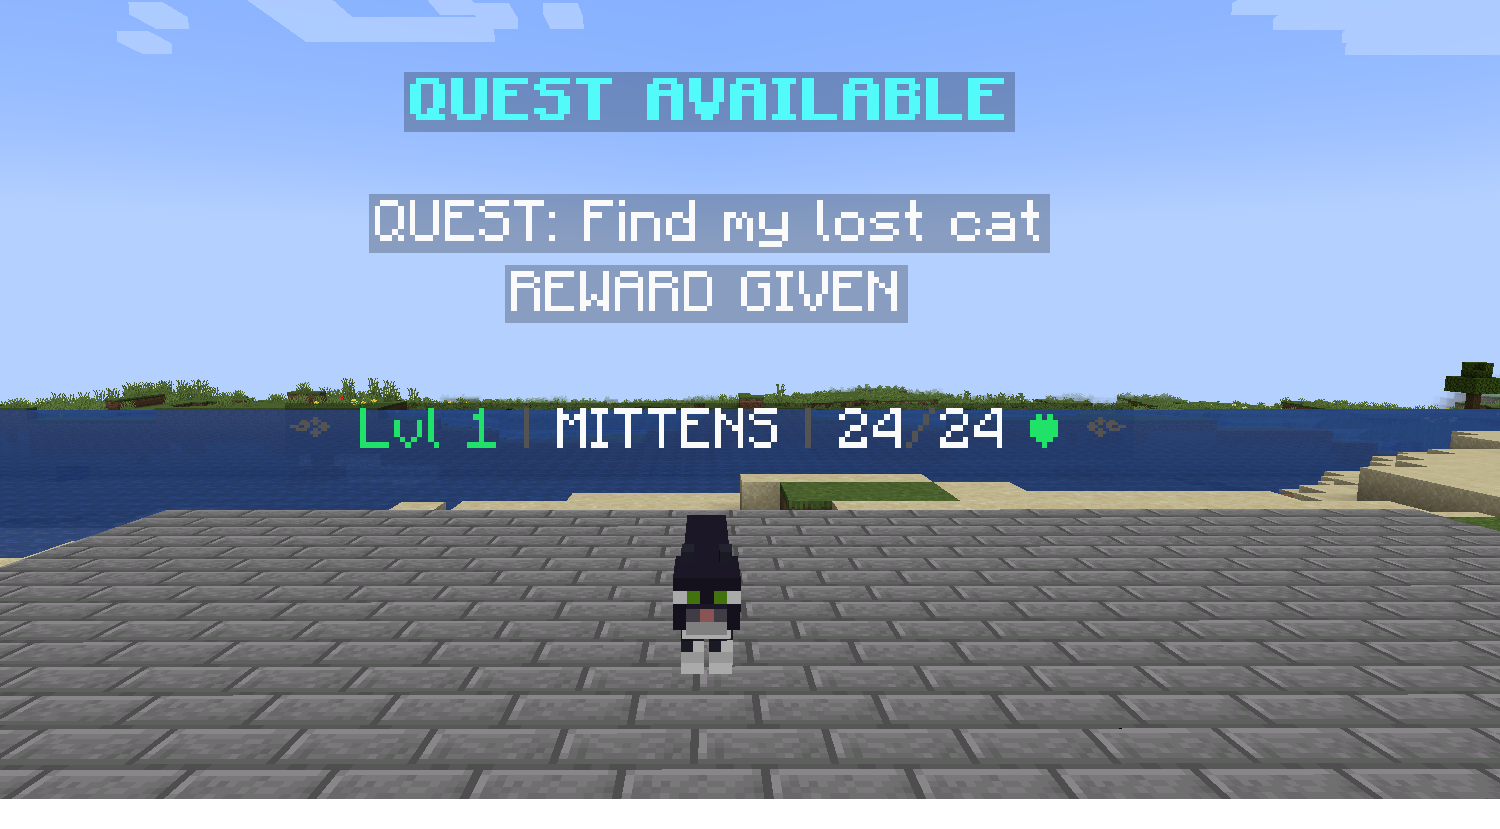
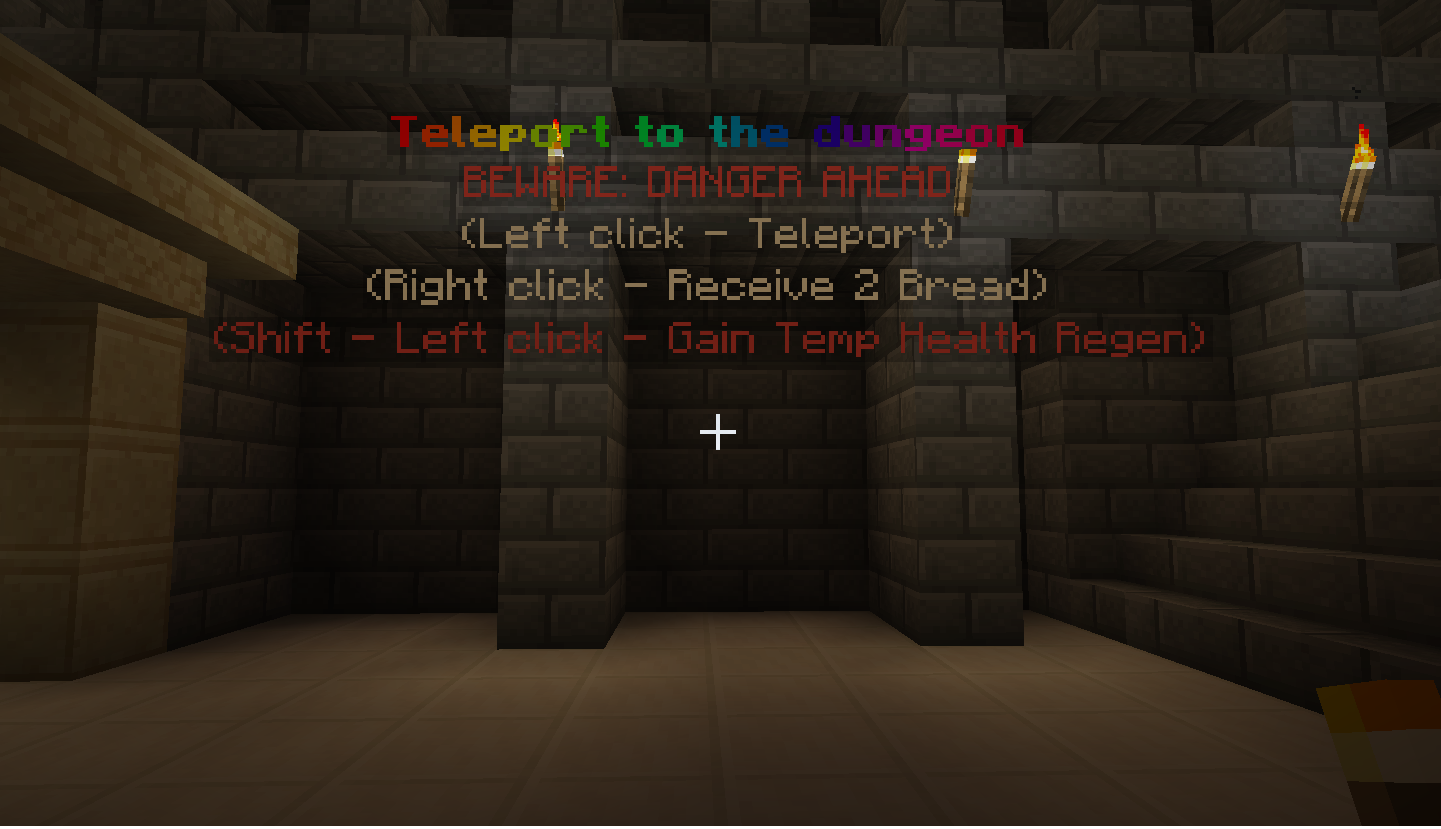
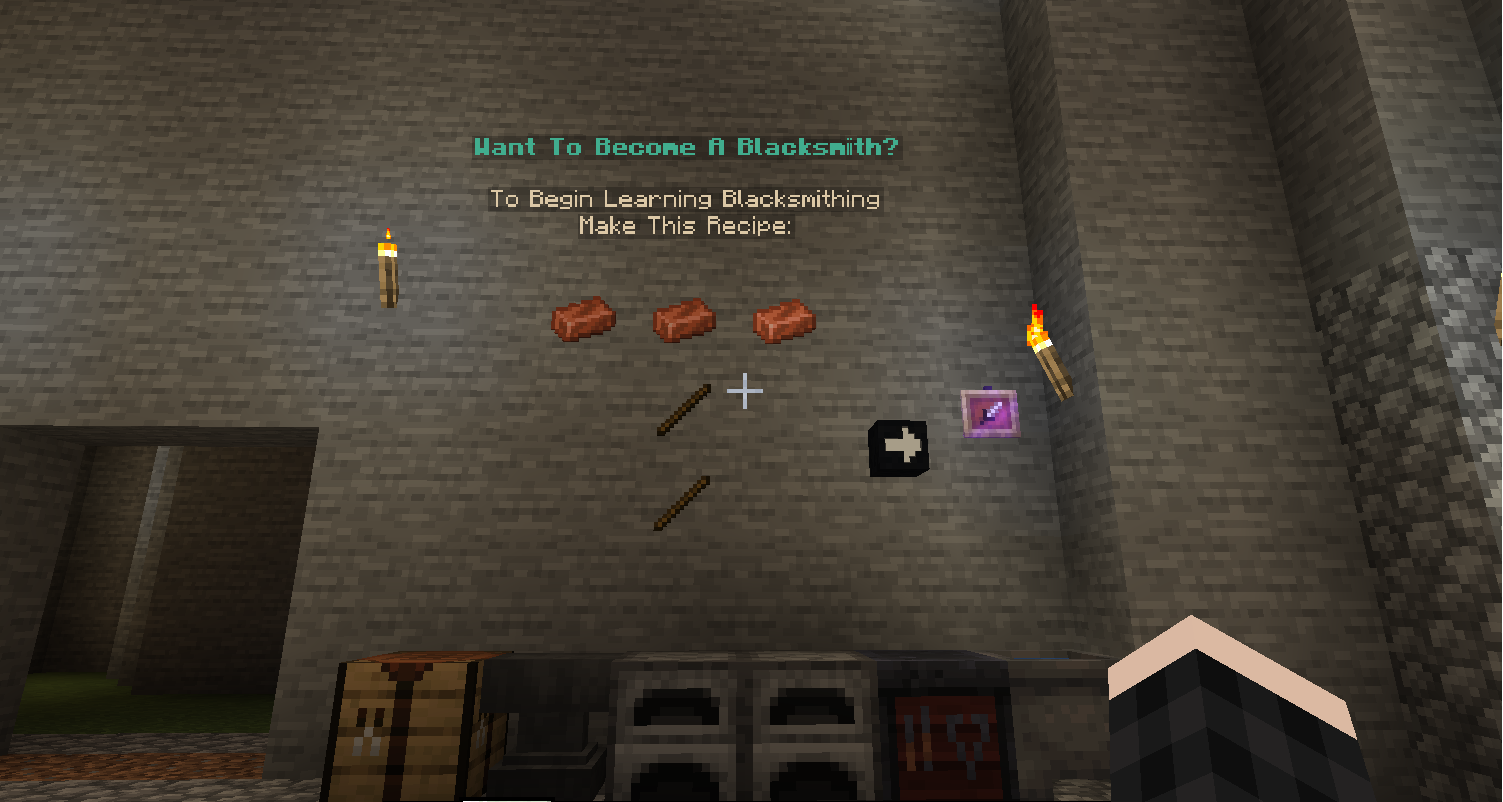
Here are some examples of how we have used some holograms:
The above are just a few ideas for how you can utilise holograms in your server. You can also animate the text to make your hologram eye catching and interesting. Here's an example of how we animated one on our server:
Creating Your Holograms
There are lots of commands that you can use with DecentHolograms, and you should get the wiki ready so you can easily reference. You can either create the hologram in command strings or in a .yml file. We personally find editing a .yml file to be much easier and can allow for better visualisation of what you're making, but you should choose the method that is best for you.
Before you begin, it's good to know that:
To create your first hologram, type '/dh create <name of hologram>'. This will create a new .yml file in /plugins > /DecentHolograms > /holograms. Now, go to your new .yml file in /holograms and open it, this is where we are going to be creating our awesome new hologram. By default the .yml will be rather empty, so while you're learning how to create holograms, we'd recommend using some of the examples given by DecentHolograms and building off of them.
Go to the DecentHolograms wiki and you can view various examples of holograms and the actions and abilities you can assign to them. We've based some of our holograms on these examples to help us get started.
Here is how our 'Welcome' hologram .yml file looks:
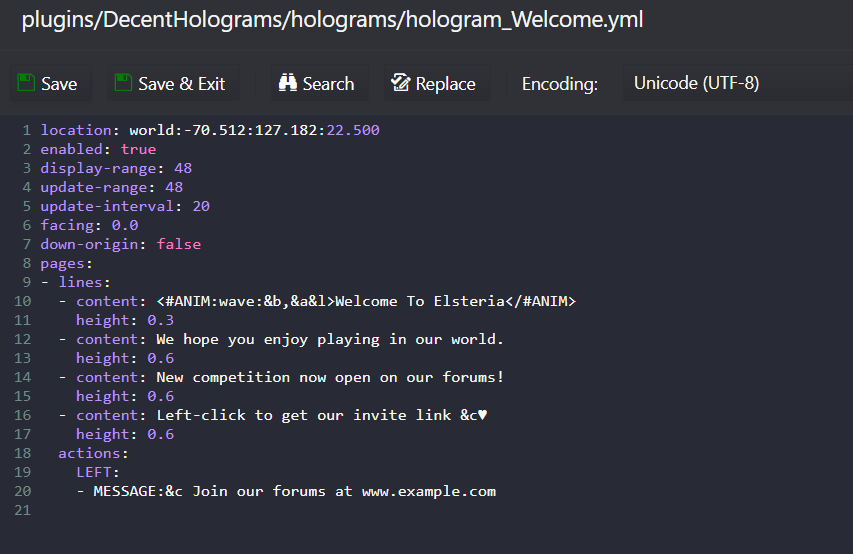
We've made our hologram include an action so that whenever a player left clicks the hologram the console will send them a message with the URL of our forum, and it's a clickable link so our player can go right to our community forums. You could use this for your social media subscriptions, such as YouTube, TikTok, Twitter, Instagram etc.
You can create holograms that perform various actions, such as teleporting the player if they click the hologram. You can even go one step further and only perform an action if the player has specific permissions. This would be a great utility if you have various ranks on your server, and you want your players with the gladiator rank to go to a gladiator-only area, as an example. If a player without this permission clicks the hologram, they won't be teleported, and no further actions will be given. We would recommend LuckPerms for this, and we'd recommend our tutorial on setting up ranks to help you get started with adding more depth to your server.
You can also use holograms to issue items via the console. This would be a great utility during quests or events, and you could use this in a lot of creative ways on your server!
As you can see, there are several ways that you can customise your spawn and server using holograms, to give your players information and also to perform certain actions. This is an improvement over other alternatives such as a hundred signs or sending someone to an external website to read about your server.
Protecting Your Spawn From Graffiti And Building
We now want to protect our server spawn from players building, breaking, digging, placing signs and other actions that could damage spawn. So, we will use WorldEdit and WorldGuard for this.
Type '//wand' and you will receive a special axe that you can use to select a cuboid area. You should read through the quick start guide for WorldGuard that will make things a little more clear. We will select two points in our area, and when we're happy with our selection, we want to type '/rg define spawn'. This will make our server spawn nearly complete!
Before we finish, we may want our server admins to build and edit the spawn so we want to add this group to our spawn permission by typing '/rg addmember spawn g:<permission group name>'.
You can make your server spawn as informative, creative, fun, and epic as you want. You should spend some time planning your spawn and put yourself in the shoes of your player, will they be confused when they log in? How can you direct them to Skyblock, Survival, and minigames?
We hope this tutorial has helped you understand how you can make a server spawn. You may also find our other tutorials useful, such as how to create a custom fishing event, and how to set up player ranks.
If you're brand new to Tebex you may find our getting started guide useful, and if you have any questions our friendly support team will be happy to help, just send them an email at support@tebex.io.