
This post will provide some guidance for creating custom maps in Grand Theft Auto V using Codewalker. If you want to make some unique areas for your players to explore and roleplay, then this guide should help!
This guide is using Codewalker created by dexyfex, version 29, a great tool for working on customisations. Codewalker also has a Discord (link on Codewalker page), and if you have any further questions about using this tool you should join the Discord and get involved in the community. By joining the community, you may also find lots of great advice and tips about creating custom maps in Grand Theft Auto V.
This guide was also made easier by using GTA-Objects for object referencing. If you follow along with this tutorial, by the end you should be able to place objects into your custom map and save and import your map to your server.
How much you customise your map is entirely up to you, but remember that you should be aiming to provide a unique experience to your players, and what better way to make an impression than with a custom map that is different than anything they have played on before?
An Introduction To Codewalker
There are various tools available for editing maps, but for the purposes of this guide, we're using Codewalker which you can download on this page. Codewalker is entirely free to use, but if you benefit from using the tool, consider thanking the developer (dexyfex) for their hard work.
Once you have downloaded the Codewalker .zip file, you will need to extract this to a suitable location. Once done, simply open the file, and click the Codewalker.exe. You will be asked to locate your Grand Theft Auto V folder. If you're not sure where it is (for those of us who are disorganised) and you're using Steam, a handy way to find it is to find the game in your Steam library and right-click. Click Properties > Local Files > Browse. You've now got your location! Enter your GTA V folder location in your Codewalkers prompt, and you'll soon see the world of Los Santos open up.
We recommend watching this short Codewalkers basics video by BeamMP Mod Team, it's just under 6 minutes long:
Editing Your Map
As you can see, you can fly around the map file of Los Santos with your WASD keys, left click to turn your camera, and right click will move the sun in the sky! On the right side of your screen, you have a collapsible menu - open it. And now, press T to open your toolbar.
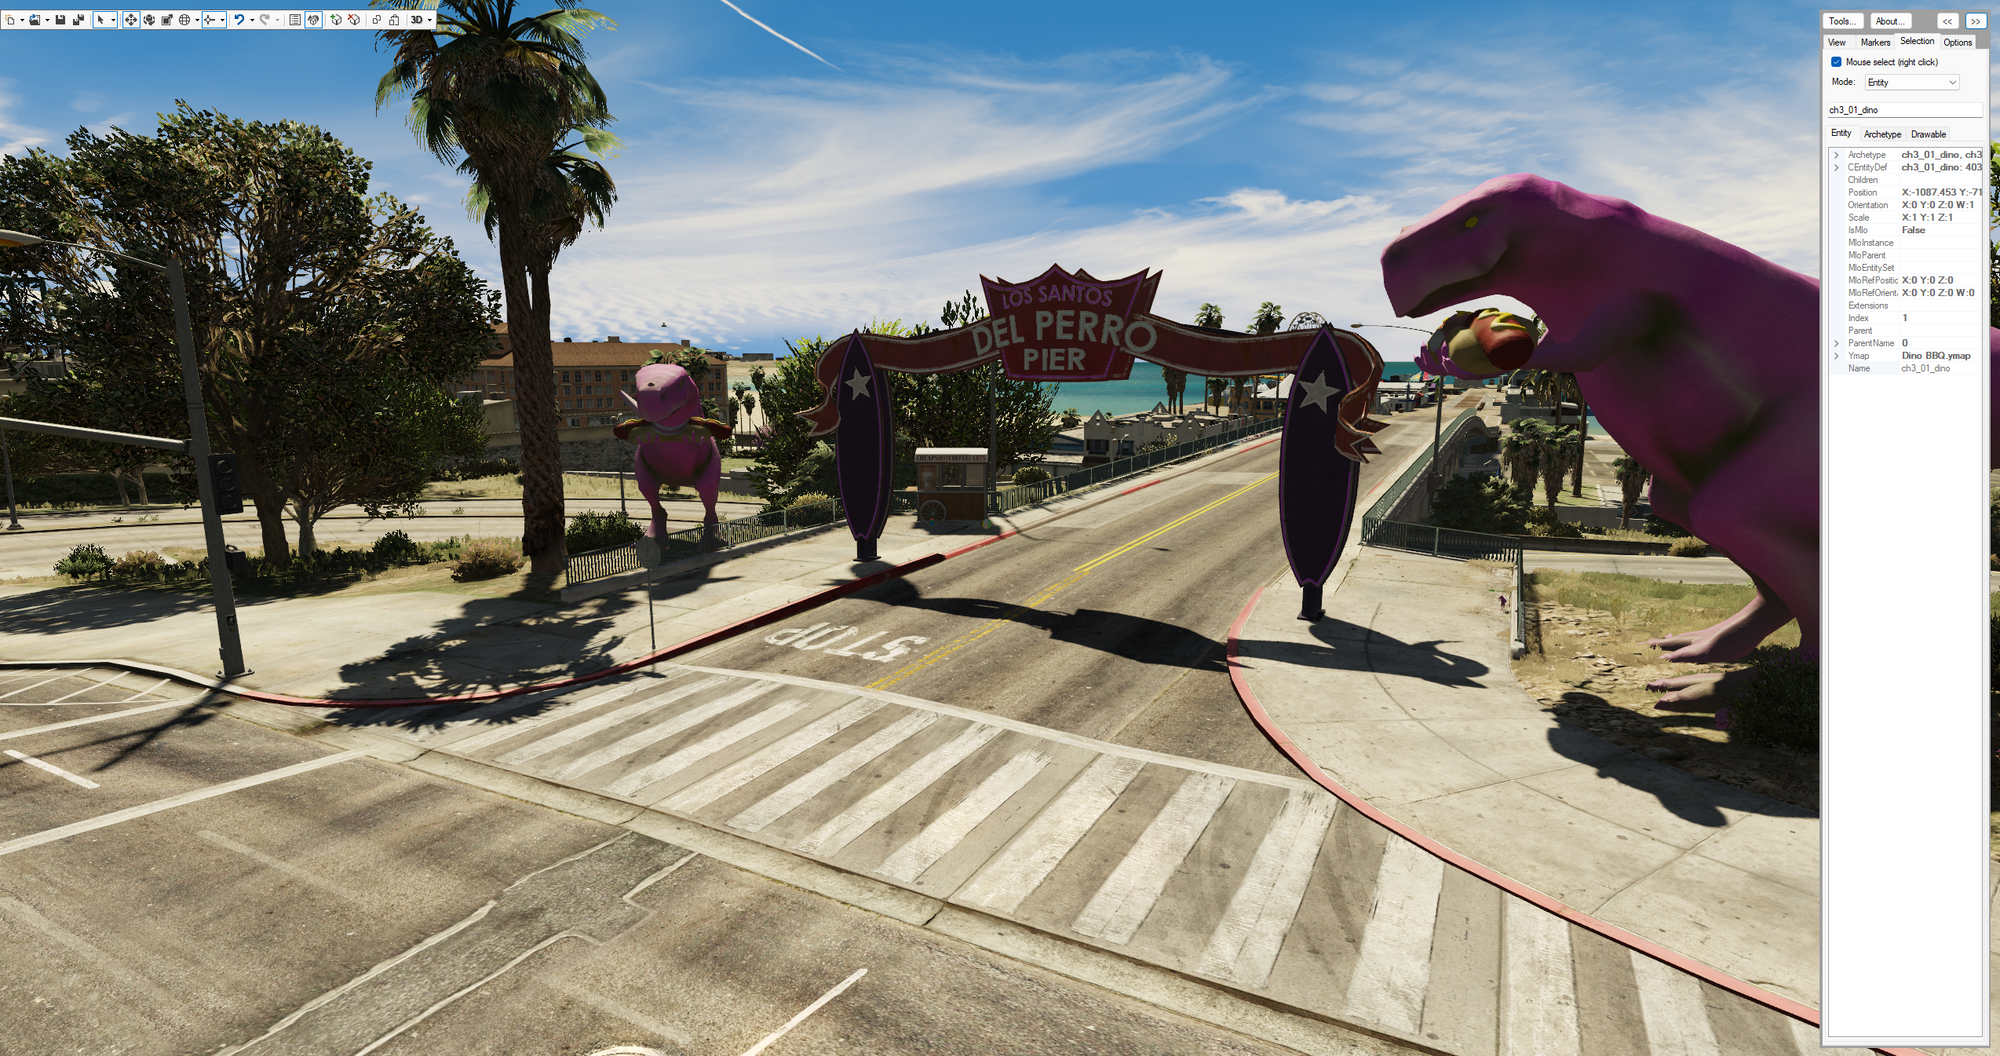
For easy selection of the assets you want to move around, click Selection in your sidebar, and enable the Mouse Select (right click) option. Now you can easily navigate the map using WASD and left-click while using your right-click for a quick and easy selection of the asset you want to control.
In our guide, we're going to imagine we want to create a fun area for beachside events, and we want to use some fun objects to make our event entrance a bit more fun. We want our players to drive down this road to head to our awesome ingame event location, where a regular BBQ and fireworks show will take place. This location will also be great for airshows, and many other events! What better way to do this than with an honour guard of hotdog-eating T-Rexes?
So, we headed down to Rex's Diner and we selected the T-Rex just outside with a simple right click. If you don't want to manually do this, simply use the GTA-Objects resource for quick and easy file names. Now, let's start a new .ymap file, and you can call it whatever you want, but we think we'll name ours after our summer event 'Dino BBQ'. Ensure your .ymap file is highlighted, and then open your Ymap options. Select Entity.
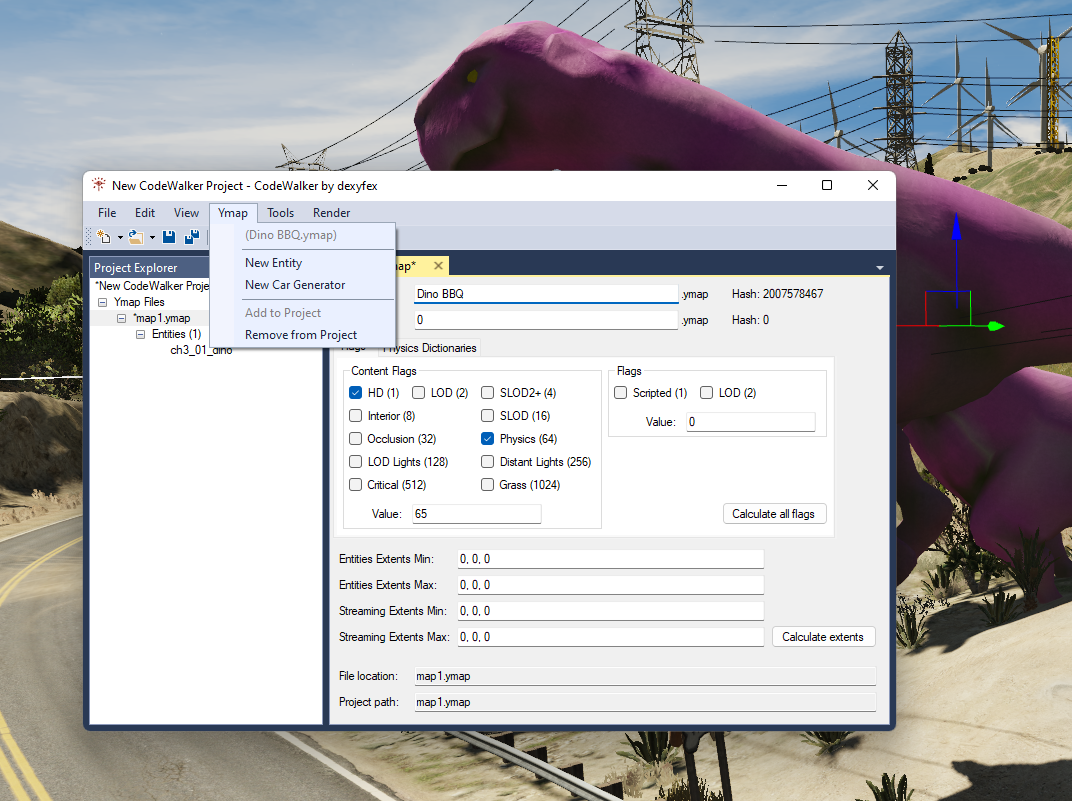
In our new entity window, we'll paste in our dino's asset name, 'ch3_01_dino'. Now we have done this, we can minimise the Codewalker project window, and move to our event location. Because we already know we want to host a variety of events at this location, we want to make it different from other servers and also make it stand out so our players remember us!
For each object you want to use and move around in your map, you should create a brand new entity. By doing this, you'll be able to simply highlight your chosen entity and quickly paste it into the world making your life a lot easier while you craft your server. A great resource that you should use is GTA-Objects, for a super quick and easy model viewer and list of object filenames.
We've headed to Los Santos Del Perro Pier for a beachside location, perfect for BBQs, air shows, and more. Now, we can simply click Paste in our toolbar, and our chosen object will appear in the world. Using the toolbar, we are able to position our object in the location we want, though you may find you need to practise a little bit to get the hang of clipping to the ground and positioning etc.
We have arranged three T-Rex, a beach ball, some sand buckets, and a coffee stall all at the entrance to the pier. For the purposes of this guide, we aren't going to be doing anything too crazy with our map, we just want to show you how you can customise your own.
Let's save our map as it is. We open up the Codewalker project window and highlight our .ymap file, we want to click Calculate all flags, then Calculate extents, and then click Save.
Preparing Your Custom Map To Be Installed
Now that our map is now complete, we need to prepare it for installation. You can do this in two ways: you are able to simply distribute the .ymap file as it is, and the server owner will need to ensure they have either the __resource.lua or fxmanifest.lua, or you can create the .lua files necessary to run the map. If you want to create your own .lua files so that your potential customer simply needs to drag and drop to install your custom content, then you can use some of the available tutorials from the FiveM community. There is a tutorial for preparing resources, made by FAXES, that will be useful, you will also find this knowledge base article helpful from Cfx.re. You will also need the resource manifest version, to help make sure you're packaging your map correctly.
If you plan to distribute your .ymap by itself, it would be courteous to state this on the product description, and likewise if the .ymap comes included with the necessary lua files to run properly on a server. This is so your customers are informed and can decide whether they want to download your file, and can avoid disappointment if the customer is unable to create these files themselves.
Installing A Custom Map To Your Server
We're using ZAP-Hosting for our FiveM server, so instructions may differ depending on which server host you are using.
On the game panel, scroll all the way down to FTP-Browser, and you'll be taken to a new page that has various options. We want to install Filezilla, and we also want to select the version for the Client. When you open up Filezilla on your machine, you'll need to connect to your FiveM server by entering your server info. Once connected, you'll be able to browse the server files and begin installing your custom resources.
Watch this short video by Games and Graphics that explains how you can install a custom resource to your server via ZAP-Hosting:
Using Tebex To Distribute Your Custom Maps
You can use Tebex in a number of ways to distribute your custom content, and how you do this is up to you. For FiveM, you need to be using the FiveM store type, and you should be ensuring that you're providing your customers with as much information as they need. A basic map will be in a .ymap format, but if you wanted to really incorporate some more complex and technical events you should look at making MLO's which include scripts.
Before you get ready to distribute your content you should work through this checklist:
- Have you tested your map works when you upload it to a server?
- Have you prepared a readme file giving your customers instructions or any other info they might need?
- Have you prepared a YouTube video showcasing your content? This will help your customers decide if they want to download and use your content. We recommend Streamlabs for recording and editing, it's free and easy to get started.
- Have you written a good product description that tells your customer how the product is delivered and other important details?
- Have you decided if your content is free or paid? If you plan to take payment for your custom content, you could consider launching your new product with a coupon or sale discount. You can also consider pay what you want pricing.
- Have you prepared your Cfx forum post to showcase your new content to server owners?
Need some further help? Just drop us a message at support@tebex.io and our friendly support team will get back to you as soon as possible.